The software market has evolved from a standard ‘boxed product’ with a ‘perpetual license’ to a ‘grab it online’ and ‘pay as you go’, model. Previously, the software was categorized broadly into products or services.
Nowadays, with everyone moving to the cloud, the ways how software is delivered or made available to end-users is evolved too.
For example, a simple Human Resouce or Payroll application can be made available as a pre-installed product on a Virtual Machine (Infrastructure as a Service), or the entire application made available as just a Software-as-a-Service (or SaaS) on a per-user or per-seat basis.
With this approach, discovery, purchasing or procuring, and deployment of these software products became a challenge.
It is a one-stop shop for individuals, startups, small or medium businesses, or even enterprises to discover, find, search, purchase, procure, and deploy solutions on top of the Microsoft cloud (Azure, Office 365, Dynamics, etc…).
Having said that, publishing solutions on Azure Marketplace can be a daunting task if you’re new to Microsoft world. It could be overwhelming.
I’ve curated a list of videos, which should help you to kickstart your journey with Azure Marketplace and deploy your solutions over there.
While interacting with my colleague Mallik, we came to a scenario of deploying multiple web applications under single Azure Web App. Well, it is supported. But we never tried it ourselves. So, this time, we thought of doing Hands-on and here what we learned – step by step.
Project Structure & Solution
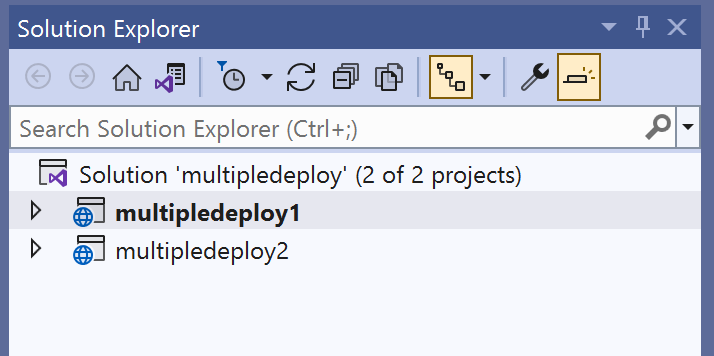
This is how our solution looks like. We have a single solution called multipledeploy with two projects or web applications in it. We want to publish it in single Web App.
Azure Web App
We configured our Web App having S1 plan with these two path mappings. Note that, these are 2 separate applications.
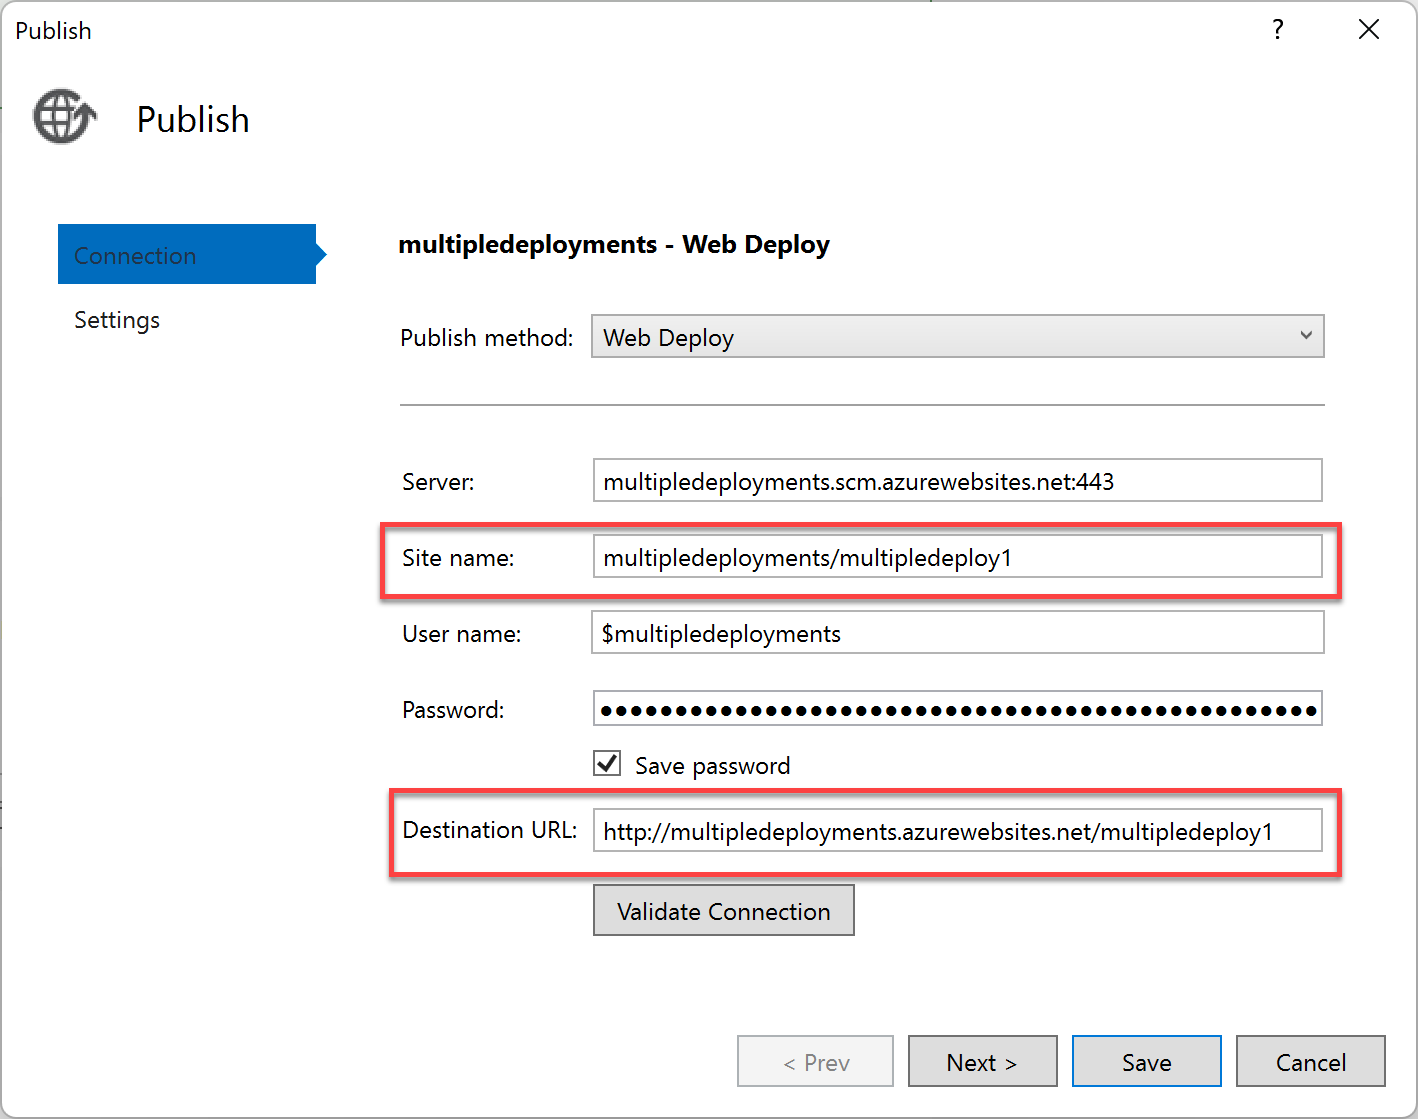
Publish Profile
In the Publish Profile we made changes to ‘Site name’ and ‘Destination URL’ properties by appending individual site names like multipledeploy1 and 2. This will make sure to deploy these web sites individually in different folders in IIS.
The Problem
This deployed 2 websites in 2 different folders (treated as Applications) in a single Azure Web App. And both these apps ran for the 1st time. However, we got the error.
This is a typical ASP.NET error which says, we can’t run multiple apps in same host/pool. We need to create separate pools for each apps. However, there is no setting for that. So, what’s the solution?
The Solution
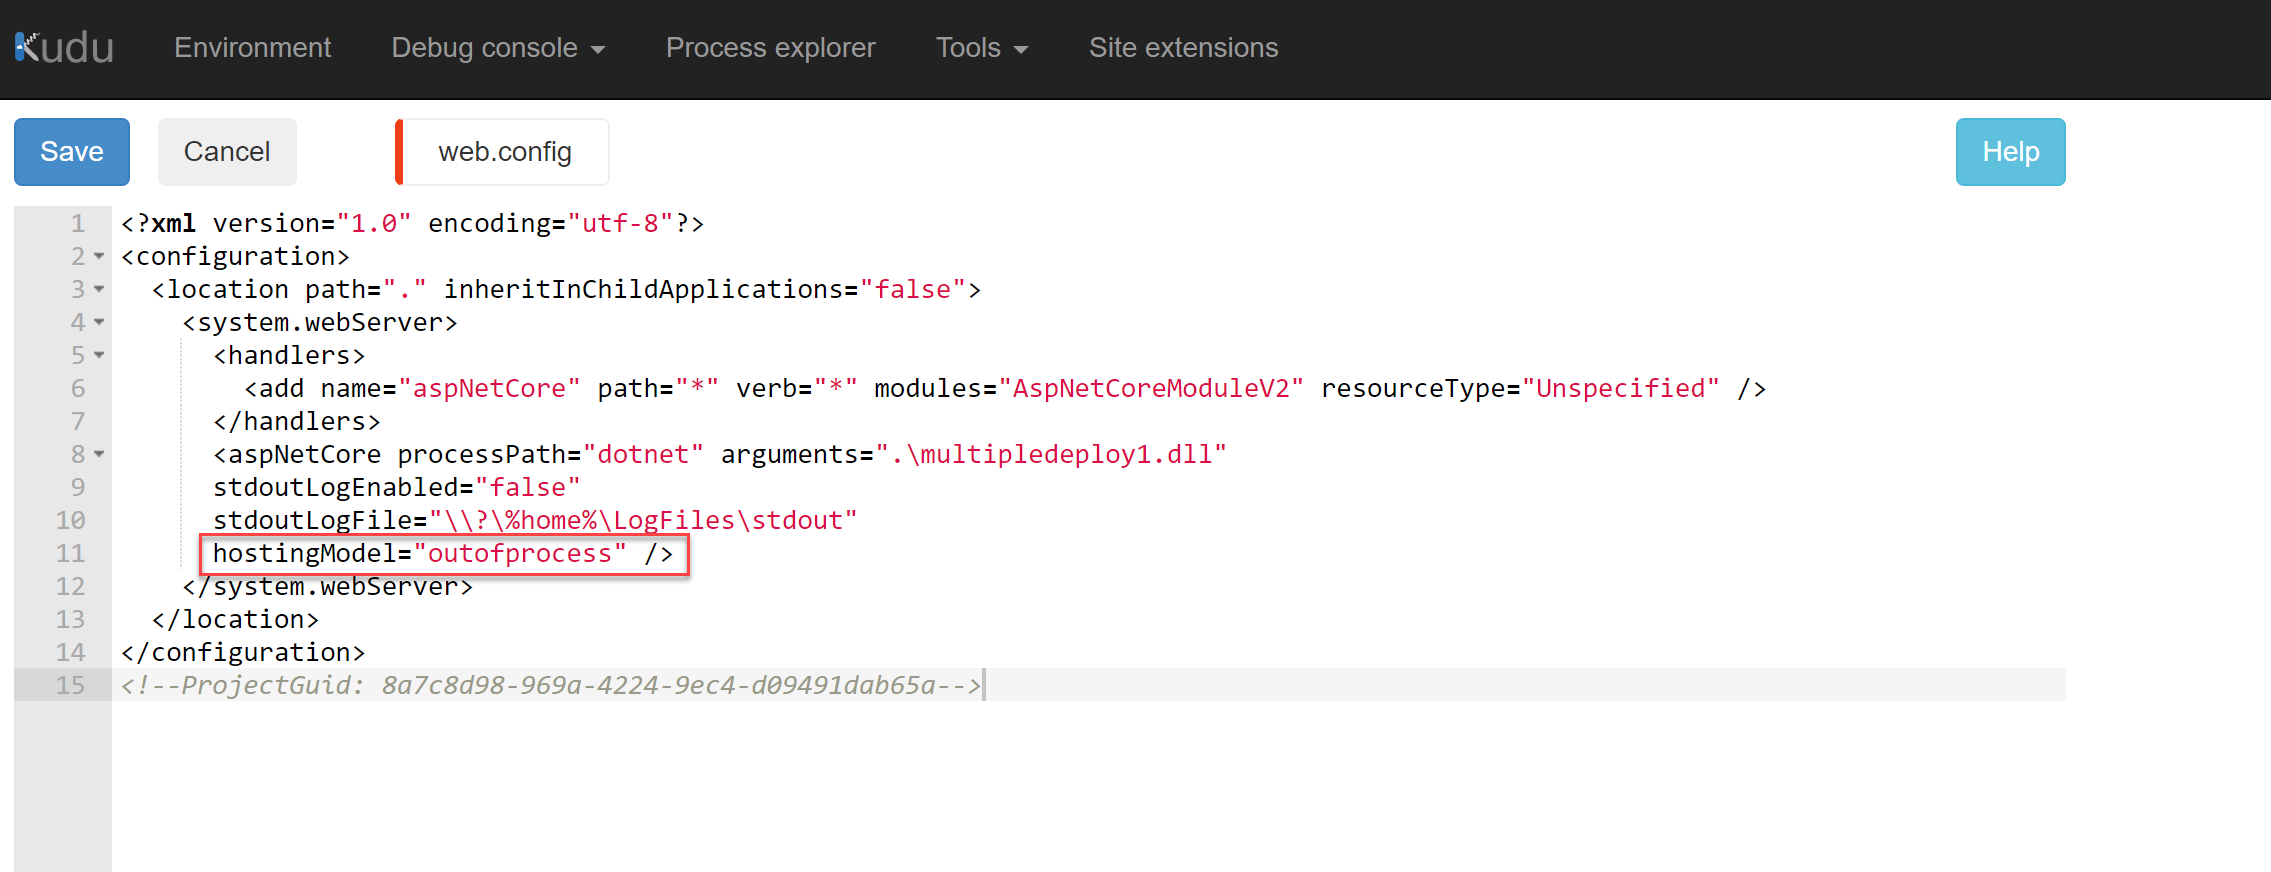
When you deploy or publish the app, web.config file is generated on IIS. You can manually add that to your project as well. In that file, you can mention to run the web application in ‘outofprocess‘. Add this value to hostingModel.
This will run both the applications in their own application pool. Refresh or restart the app to see the effect.
Conclusion
It is possible to run multiple web applications in Azure Web App. You just need to make sure you’re publishing these apps in right folders and setting it up to use out of process hosting model.
Many times you many want to automate resource management (provisioning, deploying, deleting, modifying) within Microsoft Azure. There are multiple ways to achieve this. For example using Azure Resource Manager templates, PowerShell scripts, Terraform scripts and many more. However, REST APIs is still favorite for many. These APIs help writing custom applications or integrate this process within existing application. In this blog post, let’s understand how we can call these APIs from Postman. In this manner, we will also understand how to call these APIs from other languages.
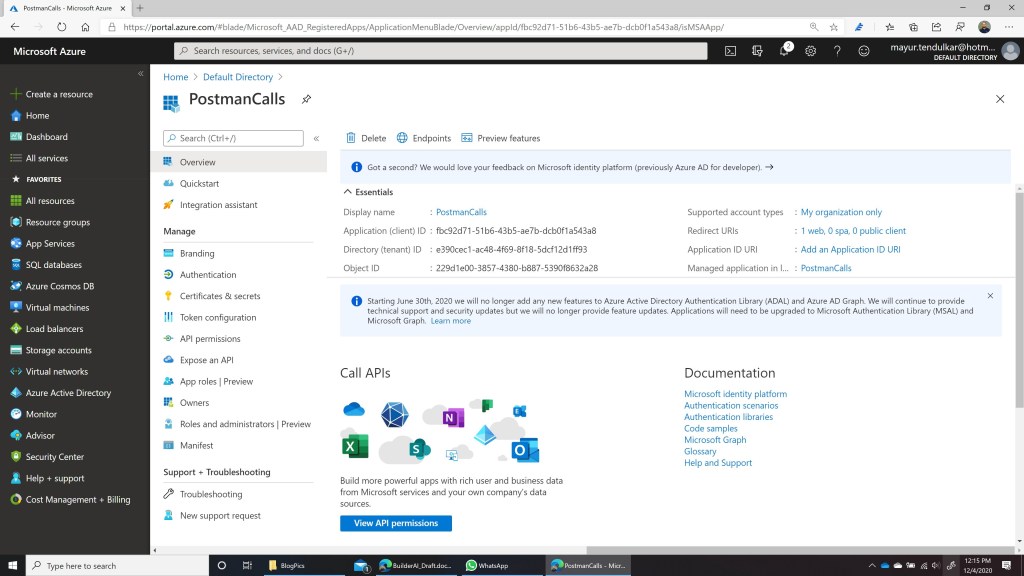
Application Registration
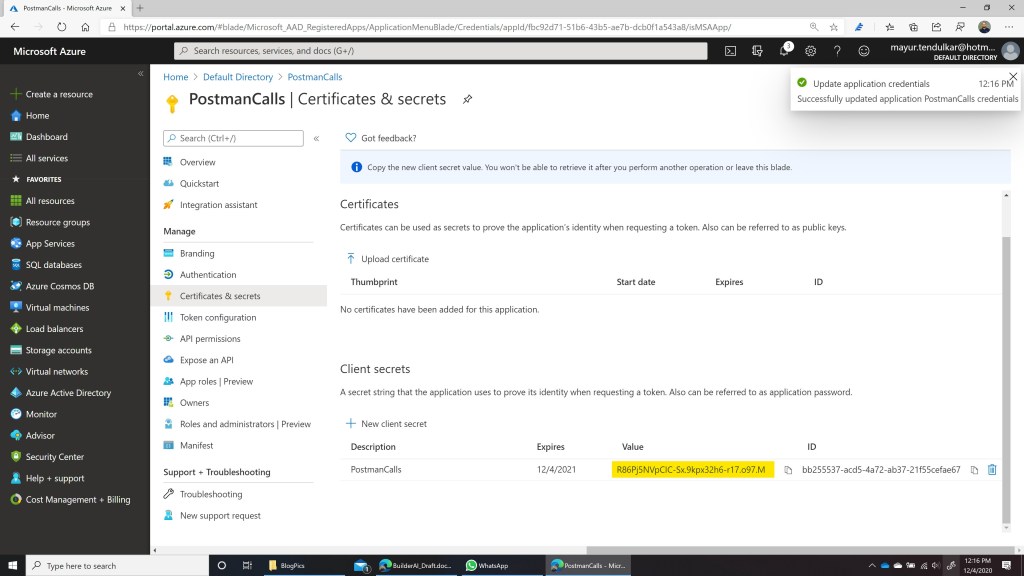
First, navigate to Azure Portal and under Active Directory register a new application. Let’s call it as ‘PostmanCalls‘. Once the app is registered, make a note of Client ID, Tenant ID as it will be required in next steps.
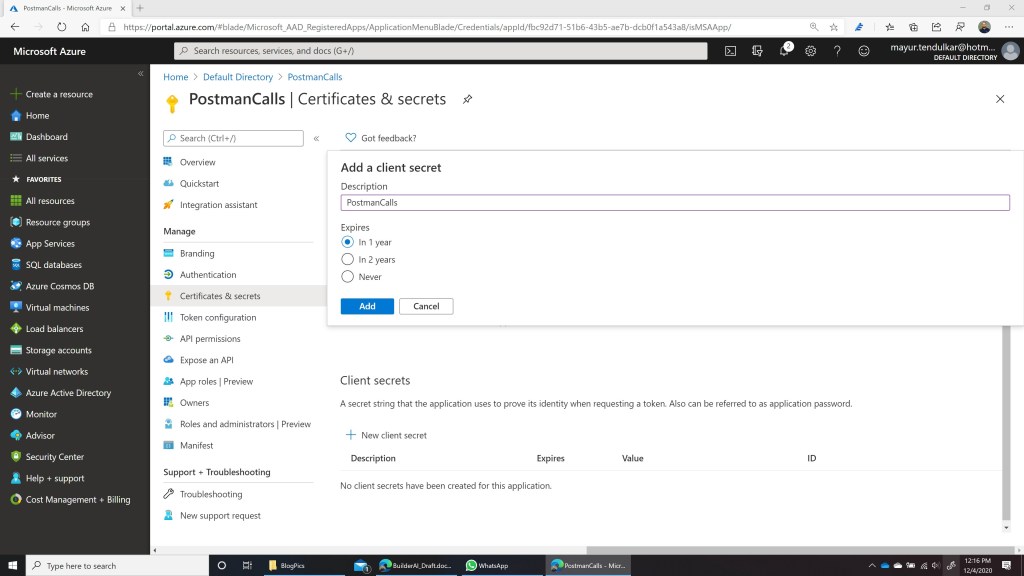
Client Secret and API Permissions
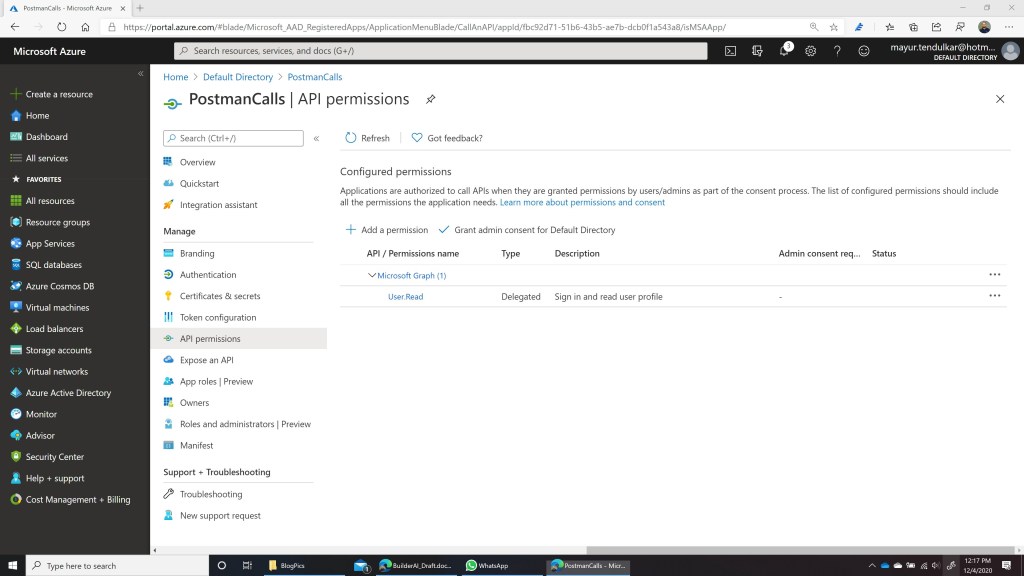
To call the APIs from Postman, let’s create Client Secret and provide permissions to Azure API from this newly registered application. Also grant admin consent for default directory on the same screen.
Application Permissions
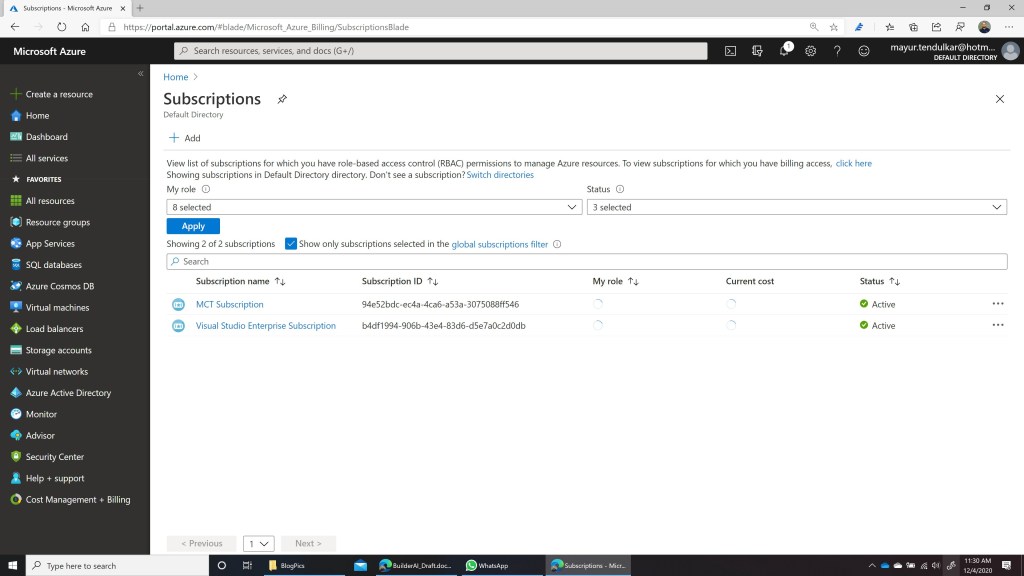
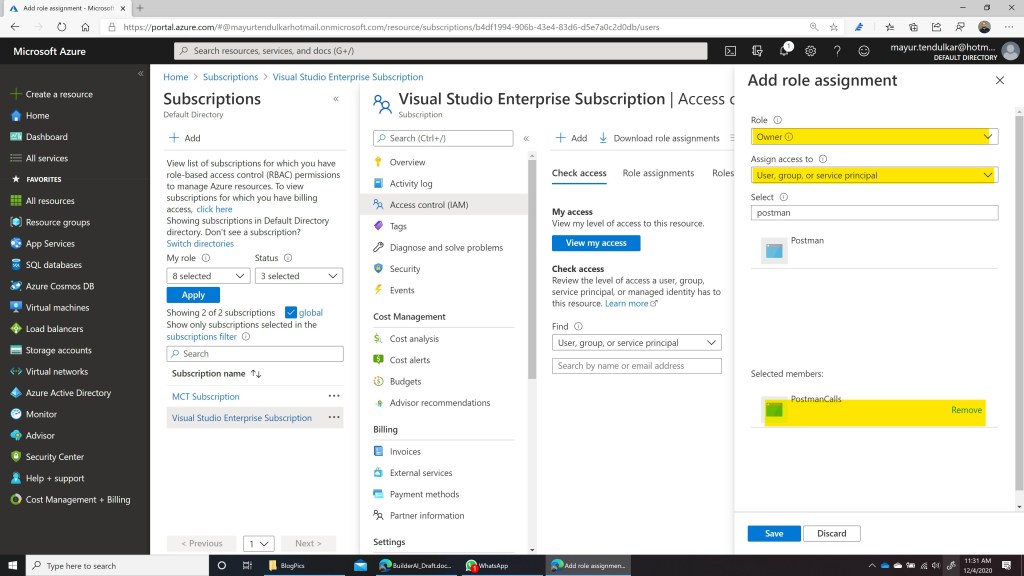
Once the app is registered, let’s give app the permission to modify resources within subscription. In this case I’m providing ‘Owner‘ role which is a God Mode here with full access to ‘PostmanCalls’ app which we have registered sometime back. To do this, go to Subscriptions and provide access to this app.
Acquire Token using Postman
Using Postman, we’ll call Azure Active Directory APIs to acquire a token, which can be used further for calling other rest APIs. In this case, we will be using OAuth2 Token endpoint and Client ID, Tenant ID, Client Secret noted from above steps. The URL looks like this:
https://login.microsoftonline.com/<tenant-id>/oauth2/token OR

https://login.microsoftonline.com/<tenant-id>/oauth2/token?grant_type=client_credentials&client_id=<client-id>&client_secret=<client-secret>&resource=https://management.azure.com/
Note the token returned from above request. This will be required in next step.
Call Management API
Almost every resource in Azure has API associated with it. You can create Storage Account, Virtual Machine, User, etc using these API. To make it interactive, let’s see how we can assign role to existing user. To understand roles, currently I’ve ‘tendulkar’ user available in my Active Directory and having 2 roles as Contributor and Classic Network Administrator.
To assign roles, we’ve a Azure API documented here. To assign a role to user, we need to call this API as PUT method and provide Object ID (ID of the user) and new Role ID (can be found here for roles). We also need to provide a GUID (generate it using any tool). So the Request becomes:
PUT
https://management.azure.com/subscriptions/<subscription id>/providers/Microsoft.Authorization/roleAssignments/<generated-guid>?api-version=2015-07-01

Body:

{
  "properties": {
    "roleDefinitionId": "/subscriptions/<id>/providers/Microsoft.Authorization/roleDefinitions/<guid from link>",
    "principalId": "<user id/object if>"
  }
}
Once the API is called, Role will be assigned to the user and this can be verified from portal. In this case I used ‘Network Contributor’ role to assign.
Conclusion
In this way, we can automate most of the things which can be done through Azure Portal using Azure REST API. We should be able to call these API from any language and any platform which understands HTTP protocol. We just need to register the app with Active Directory, provide right permissions and call right API endpoints.