In 2006-07, when I was writing Windows Mobile apps, I really enjoyed using MessageInterceptor type. Using that, we could build our own workflows based on Text Messaging. For example, send an SMS to the device and if SMS contains “Play”, play a song. If SMS contains “Stop”, stop playing the song. And what not. Oh, and I could say if the message is from my parents, reply “I’m in college” and if from friends reply as “I’m waiting outside the movie theater”.
However, I missed this functionality for a long time with different devices (lack of message intercepting API on some platforms). And recently I eagerly wanted to have it for the email, considering the heavy influx of emails in my new role. I got to know about Azure Logic App Service and thought, perhaps let’s go ahead and build something similar. And for me, this is a fantastic way to learn something new.
Scenario: Let’s build a solution which will read incoming email messages and if the message is from one particularly annoying friend, let’s reply with an equally annoying message. If it is from my manager, let’s reply with some positive update and if from a customer we’ll reply with actual OOF. Well, a lot of email service providers allow you to setup OOF, but it is not customizable for different emails. Outlook in Office 365 allows 2 separate OOF messages, one for members within your organization and one for outside organization. Our solution will provide more customizations.
Step 1: Create Azure Logic App Service
Navigate to Azure Portal and Create a resource. Search for Logic App and click on ‘Create’. Give it a name, select the subscription, create Resource Group and finally select a location near to you.

Once Logic App is created, scroll down the next screen and click on ‘Blank Logic App’. This will allow you to add the logical functionality to the just created app.

Step 2: Design Logic App – Use Connector & Trigger
Connectors allow you to connect your logic app with the desired service. In our case, we’ll use Office 365 Outlook connector to connect to the mail service. And once you connect to the service, there will be a Trigger to activate the logic app. Again, in our case, it will be an email arriving in our inbox.

Once you select the connector and trigger, sign in with your credentials and connect the email service with your logic app.
Step 3: Setup the Rule and Switch Case
On this screen select the folder in your mailbox to monitor and other aspects of the email. Click on ‘+ Next step’ and write define your logic.

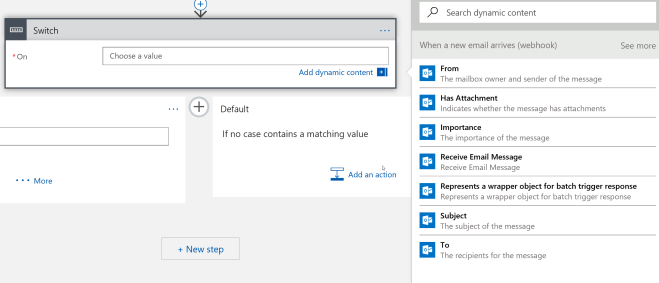
Depending on the connector selected, you’ll see different options for the switch case. For example, in case of Outlook connector and Email trigger, there can be conditions to check for who has sent the email, if it has attachments, if it has importance set or if it has been sent directly to me or to any distribution list to which I’m subscribed. These conditions will vary depending on trigger and connector.
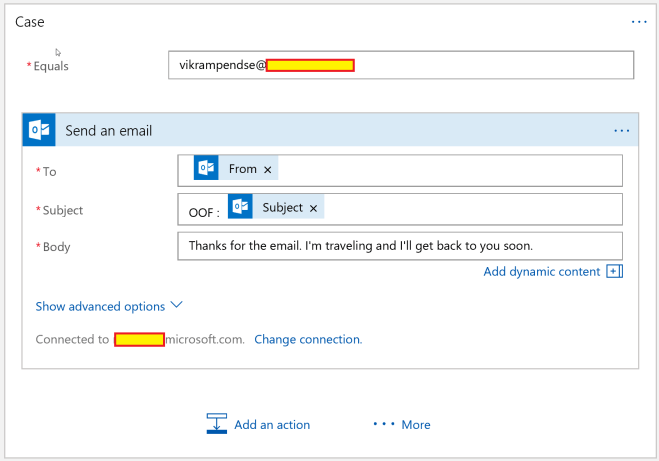
Once the Switch is set, let’s set up the cases. Here, I’m checking if the email is from Vikram (Oh, he isn’t the annoying friend :) ) and setting up a reply for him. I can also repeat this for many more senders.
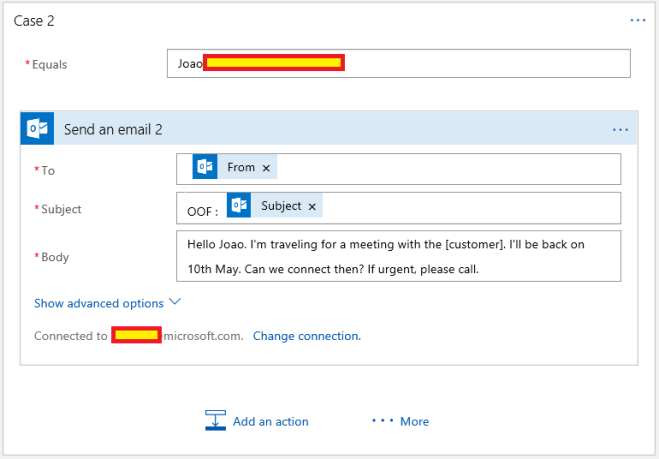
The next one is for my manager Joao,
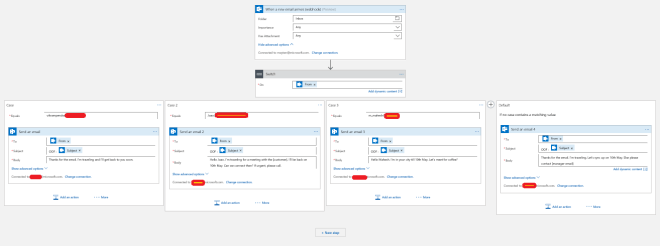
You can add as many cases as you want and ultimately add a default case. At the end, the logic app designer will look something like this:
Finally, once this step is done, Run the logic app and wait for the magic to happen :)
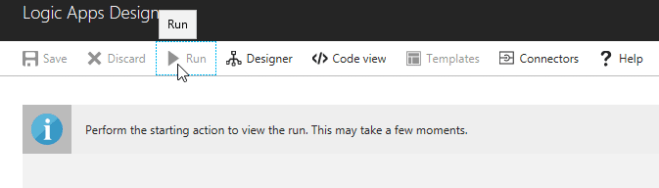
In this situation, if a user sends you an email and if the user falls under the cases, the user will receive the response accordingly and if not, user will receive the default response.
Conclusion:
Logic Apps Service makes it easy to write workflows and automate tasks. And even though we used Logic Apps for email workflow, there are connectors available for different services which you can find here. If this list doesn’t cover your service, you can write one on your own connector and documentation for the same is available here.
Don’t forget to ‘nuke’ the resource group once done with it or you’ll keep replying to all your emails – automagically. :)
Happy coding (or designing workflows :) ).
Namaste,
Mayur Tendulkar