Xamarin.Forms And The Case of Failed NuGet Packages – Part 2

Most enterprise mobile apps require enterprise-level authentication mechanism. In that case, people use tried and tested Active Directory Authentication Library (ADAL) or Microsoft Authentication Library (MSAL). ADAL is in GA and it works fine with cross-platform mobile apps built using Xamarin. However, MSAL is in ‘preview’ and it offers nightly builds to try out. I wanted to try the latest nightly build (ver: 1.1.1-alpha0417) as it uses updated Android Support Package and old preview bits of MSAL (ver: 1.1.0-preview) were not compatible with latest  Xamarin.Forms anymore. Here, I was trying to build one app over holidays and I got stuck on one interesting issue. Let’s discuss it in this blog post.

The Problem:

When you create a blank Xamarin.Forms app, it automatically references Xamarin.Forms NuGet along with all the required dependencies.

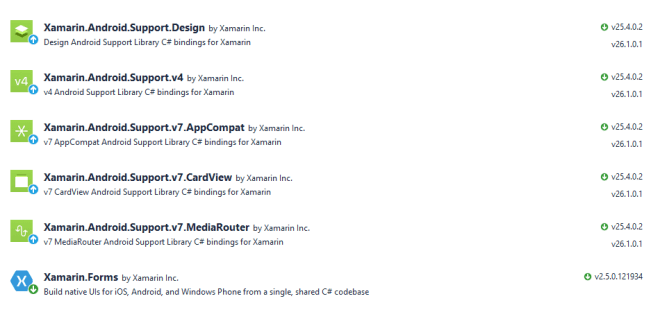
At this time, when you’ll try to install MSAL, you may get stuck at this issue of versioning.

The reason being Xamarin.Forms NuGet requires a specific version of Android Support Packages whereas Microsoft Authentication Library requires anything above Ver. 25.3.1.

The Solution:

Sometimes, things are very simpler than it looks. I spent a lot of time on solving this issue but was unable to fix it. Thanks to my friend Nish, who helped me with his ‘ problem-solving skills’ and we got this working.

The solution is simple:

  1. Remove all NuGet packages from Android project. For the sake of it, close and restart Visual Studio.
  2. Open the solution and Install MSAL NuGet package first.
  3. After installing MSAL NuGet, install Xamarin.Forms NuGet package.

Bingo!

Now you can build Xamarin.Forms apps with Microsoft Authentication Library. If you want to know more about how to use the SDK, follow the blog post here on Xamarin blog.

Even though I’m talking about Xamarin.Forms and MSAL here, this blog post is very much applicable wherever you’re trying to use any NuGet package which has updated dependency on Android Support Package.

Setup info:
Visual Studio Enterprise 2017 Preview (15.5.2)
Xamarin (4.8.0.753)
Xamarin.Forms (2.5.0.121934)
Microsoft Authentication Library (1.1.1-alpha0417)

Namaste,
Mayur Tendulkar


Learn Mobile App Dev & Mobile DevOps Here

DevOps Meme

My friend Prachi tagged me on this meme on Facebook and I couldn’t agree more with her. When I started my career, my entire version control was folders – zipped, tagged and stored on multiple hard-disks. But then things changed. My guru Raj, enlightened me about advantages of version control systems. I learned about how multiple people can collaborate on projects or how errors can be reversed by going through code history if version controls like Team Foundation Server or GitHub are used. I started using those and these days, all my projects and samples are either in Visual Studio Team Services or in GitHub repository.  Going one step ahead, I’m using Visual Studio Mobile Center for DevOps along with these version control systems.

But what is this all about? How it helps in building successful mobile applications? And I thought about answering these questions in a video series. The goal is to explain mobile DevOps and different steps in mobile DevOps in small (less than 10 mins) videos.  After completing this series, you’ll be able to build cross-platform Xamarin.Forms mobile application, which will consume Microsoft Cognitive Service and set-up mobile DevOps for the same.

To follow along with this series, I’m recommending following minimum hardware/software combination:

  • Intel i5, 8GB, 50GB machine with Hyper-V support & Windows 10 Professional
  • MacBook or MacMini with i5, 4GB, 50GB for compiling iOS apps
  • Visual Studio 2017 Community Preview

With these hardware/software additional services used in this series are:

Watch the 1st video here about activating these tools & services to set-up mobile DevOps.

In 2nd video learn about how to setup build automation, using Visual Studio Mobile Center.

I’ll update this blog post in coming weeks with the 3rd video in this series, which will be about building mobile applications.

Stay tuned and subscribe to my blog/channel :)

Namaste.
Mayur Tendulkar

Plugin 05: Accelerometer

In our series on plugins, today we’re going to cover plugin which can help us to work with Accelerometer sensor. This sensor is responsible to detect X, Y, Z co-ordinates of the devices. Using data received from this sensor, you can build games like TempleRun, where users can collect the coins by tilting the device.

There are different APIs for different platform and their usage is different too. First, lets see how we can use this sensor in different platform and then we’ll use plugin in Xamarin.Forms application.

Being Windows Runtime API, the API and its usage is same in Windows and Windows Phone. Here, you create object of the sensor and register for ‘ReadingChanged’ event. Whenever device position is changed, it is reported through that event and UI can be updated using Dispatcher.

public sealed partial class MainPage : Page
{
private Accelerometer _accelerometer;
public MainPage()
{
this.InitializeComponent();
this.NavigationCacheMode = NavigationCacheMode.Required;
}
/// <summary>
/// Invoked when this page is about to be displayed in a Frame.
/// </summary>
/// <param name="e">Event data that describes how this page was reached.
/// This parameter is typically used to configure the page.</param>
protected override void OnNavigatedTo(NavigationEventArgs e)
{
_accelerometer = Accelerometer.GetDefault();
if (_accelerometer != null)
{
// Establish the report interval
uint minReportInterval = _accelerometer.MinimumReportInterval;
var desiredReportInterval = minReportInterval > 16 ? minReportInterval : 16;
_accelerometer.ReportInterval = desiredReportInterval;
try
{
_accelerometer.ReadingChanged += async (a, b) =>
{
await Dispatcher.RunAsync(CoreDispatcherPriority.Normal, () =>
{
txtXAxis.Text = "X axis: " + b.Reading.AccelerationX.ToString("F");
txtYAxis.Text = "Y axis: " + b.Reading.AccelerationY.ToString("F");
txtZAxis.Text = "Z axis: " + b.Reading.AccelerationZ.ToString("F");
});
};
}
catch (Exception ex)
{
throw;
}
}
else
{
new Windows.UI.Popups.MessageDialog("Accelerometer not found", "Error:").ShowAsync();
}
}
}

In case of Android, it is again similar to Windows platform. Create object of SensorManager and register for SensorChanged event.

[Activity(Label = "Accelerometer_Droid", MainLauncher = true, Icon = "@drawable/icon")]
public class MainActivity : Activity, ISensorEventListener
{
private SensorManager _sensorManager;
private static readonly object _syncLock = new object();
private TextView x_axis; private TextView y_axis; private TextView z_axis;
protected override void OnCreate(Bundle bundle)
{
base.OnCreate(bundle);
// Set our view from the "main" layout resource
SetContentView(Resource.Layout.Main);
_sensorManager = (SensorManager)GetSystemService(Context.SensorService);
x_axis = FindViewById<TextView>(Resource.Id.lblXAxis);
y_axis = FindViewById<TextView>(Resource.Id.lblYAxis);
z_axis = FindViewById<TextView>(Resource.Id.lblZAxis);
}
public void OnAccuracyChanged(Sensor sensor, SensorStatus accuracy)
{
//Doing nothing. Just implementing interface.
}
public void OnSensorChanged(SensorEvent e)
{
lock (_syncLock)
{
x_axis.Text = e.Values[0].ToString("F");
y_axis.Text = e.Values[1].ToString("F");
z_axis.Text = e.Values[2].ToString("F");
}
}
protected override void OnResume()
{
base.OnResume();
_sensorManager.RegisterListener(this, _sensorManager.GetDefaultSensor(SensorType.Accelerometer), SensorDelay.Ui);
}
protected override void OnPause()
{
base.OnPause();
_sensorManager.UnregisterListener(this);
}
}

iOS is not any different. You create object of CMMotionManager and then listen to sensor for changes.

public override void ViewDidLoad()
{
base.ViewDidLoad();
_motionManager = new CMMotionManager();
_motionManager.StartAccelerometerUpdates(NSOperationQueue.CurrentQueue, (data, error) =>
{
lblXAxis.Text = data.Acceleration.X.ToString("F");
lblYAxis.Text = data.Acceleration.Y.ToString("F");
lblZAxis.Text = data.Acceleration.Z.ToString("F");
});
// Perform any additional setup after loading the view, typically from a nib.
}

As you can see, for three different platforms the APIs are totally different. But with Plugins for Xamarin.Forms it becomes easy. You can use DeviceMotion plugin which can work across all these platforms. And the code for same looks like:

private void BtnStart_OnClicked(object sender, EventArgs e)
{
CrossDeviceMotion.Current.Start(MotionSensorType.Accelerometer, MotionSensorDelay.Ui);
CrossDeviceMotion.Current.SensorValueChanged += (s, a) =>
{
switch (a.SensorType)
{
case MotionSensorType.Accelerometer:
lblXAxis.Text = ((MotionVector)a.Value).X.ToString("F");
lblYAxis.Text = ((MotionVector)a.Value).Y.ToString("F");
lblZAxis.Text = ((MotionVector)a.Value).Z.ToString("F");
break;
}
};
}
private void BtnStop_OnClicked(object sender, EventArgs e)
{
CrossDeviceMotion.Current.Stop(MotionSensorType.Accelerometer);
}

In this series on plugin we’ve seen how particular concept can be implemented in all the three platforms and how we can use plugin to make life easier. This will be be last post in this series, but there are many plugins available which you can explore and use in your projects. Do let me know if you want to cover any specific plugin. We’ll start with a new series in couple of weeks. Till then… happy coding :)

Namaste
Mayur Tendulkar