Thanks to Rohit Khirid for this pic, a pro mobile developer!
This is Part II of the Video Calling App blog series. You may want to check other posts on the main blog post here.
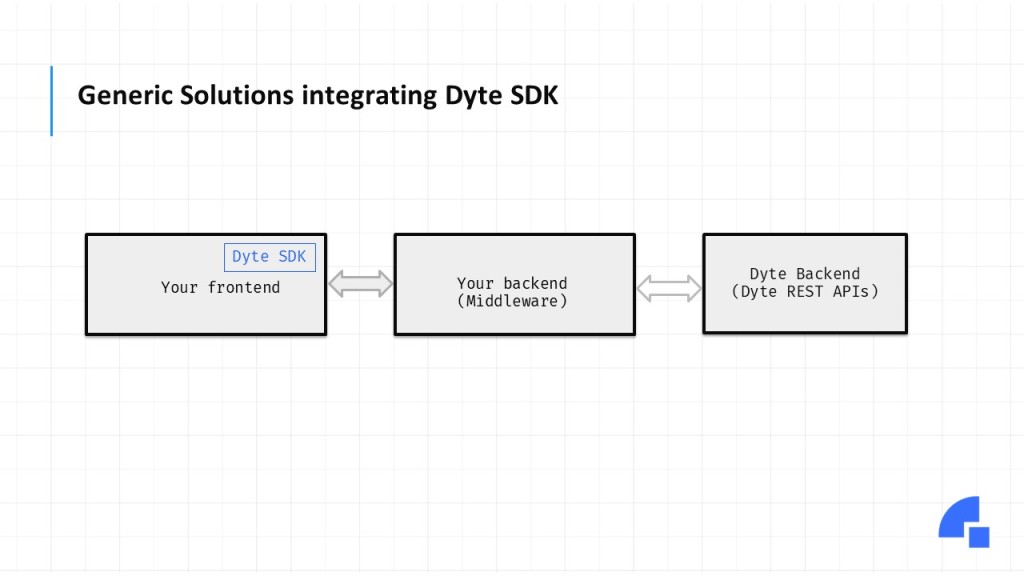
There are two parts to Dyte. The SDK and the API. SDK is about integrating the Dyte infrastructure in the front-end or UI of the application, and API is communicating with the Dyte infrastructure.

The first step in integrating Dyte into any app is to call the Dyte REST APIs. This allows the app to communicate with Dyte infrastructure. We’ll focus on the APIs in this post and cover SDK in our front-end post.
Before going deep into APIs, let’s figure out some concepts around Dyte.
Dyte Concepts

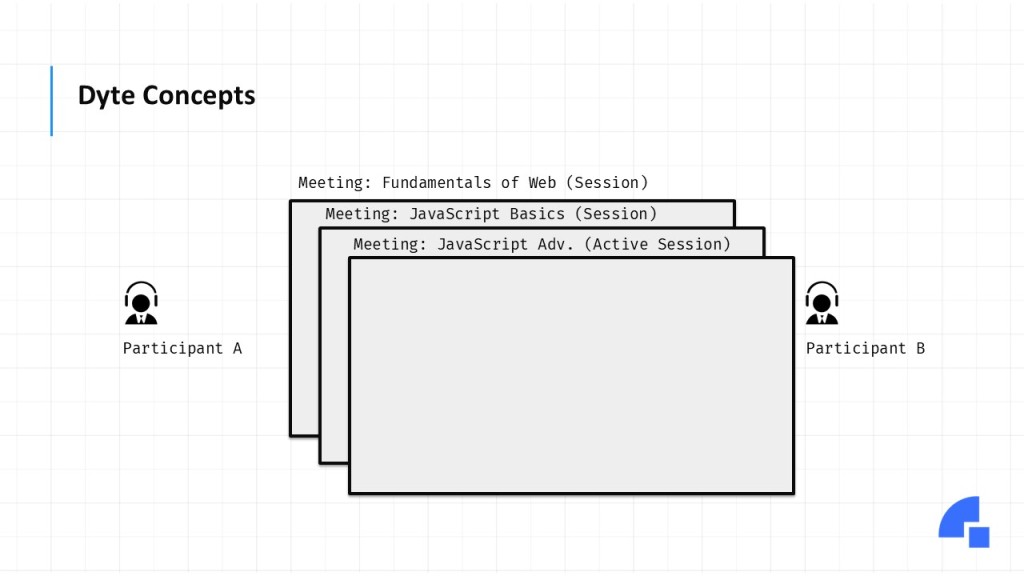
Let’s assume we’re building an online classroom application. We’ve 2 participants, Participant A, who is a teacher, and participant B, who is a student.
When a teacher and students want to join an online class, say the class is about Fundamentals of Web, we create a meeting. So, a Dyte meeting is an event where one or more participants meet.
Similarly, there could be different classes happening every day. For example, Javascript Basics and Javascript Advanced. Each of these meetings, which are already happened or been completed in the past, is called as session whereas the meeting happening right now is called as active session.
When participants join these meetings, they join with a preset. Presets are simply a set of permissions and UI configurations that would be applied to a participant. Each meeting has one or more participants. You must pass the preset when adding participants. For example, a student attending a class cannot mute other students, but a teacher can. Similarly, while some participants cannot share the screen, the person who created the meeting can. A preset specifies how the UI will appear and which permissions or features are available to that participant.
The last concept to understand is the difference between Group Call, Webinar and Live Streaming. All are meetings. However, the main difference is the user flow; a group call is a many-to-many interaction, whereas a webinar is a one-to-many interaction. Webinars also have the concept of stage and audience, with only those on stage being streamed to everyone. The audience can request to be on stage, or the host can add people to the stage.
Lastly, one can live stream the meeting to hundreds and thousands of users. By creating a live stream for a meeting.
Calling Dyte REST APIs
To call the REST APIs, you must first get Organization ID and API Key from Dyte Developer Portal. Navigate to the API Keys section and copy those values.

To call v2.0 APIs, you need to Base64 encode username:password, here username is Org ID, and the password is API Key. You can use any online tools.
Let’s try calling Create Meeting API.
If everything is all right, we should receive the HTTP code 201 with the meeting ID:
We can add participants to this meeting by calling Add Participant API.
Note that we must pass meeting_id on this request, which we received in the previous response.
Once the meeting starts, we can get an active session, and then we can perform actions like muting participants, kicking out participants, etc.
As you can see, different APIs are available to start, stop and manage the Dyte Meeting. It is essential to understand these APIs before starting the Dyte integration.
In the next blog post, we will create a backend project with our own business logic.
Till then,
Happy coding :)
Namaste,
Mayur Tendulkar

